
Starting a blog can open up a world of opportunities for you. With a blog, you can:
- Make an income online on your own terms.
- Explore and share your hobbies, interests, and passions with the world.
- Promote your businesses cheaply and effectively.
How you start your blog is crucial. You can save yourself a lot of wasted hours and lost profits by starting your blog the right way. This guide will help you avoid some of the common mistakes that new bloggers make such as:
- Choosing the wrong blogging platform.
- Failing to have a domain name or choosing one that will limit your opportunities for growth.
- Choosing the wrong web hosting company and the wrong hosting package.
- Choosing plugins and themes that slow down your site and make it vulnerable to hacking.
You need to get these issues right especially if you intend to make money from your blog.
WINTER Hosting SALE -75% Off

Take advantage of this huge black Friday sale by Chemicloud to create your blog or website now
ChemiCloud is an award winning web hosting provider (with 5/5 stars on TrustPilot). Why go with ChemiCloud?
Get your self world-class web-hosting at an unbeatable price.
How much will it cost to create your blog?
The whole process will cost you anywhere between $50 and $100 a year (or $4-8 a month) depending on the web hosting company and package you use. We shall use ChemiCloud for this tutorial. It is affordably priced and they give great discounts from time to time (Check for a discount).
I will also give you some tips on saving money on hosting, plugins and themes.
What requirements will you need to create your blog?
To create a fully functional blog, you will require the following:
- Webhosting ($40-$90 a year using ChemiCloud)
- A domain name (Free using ChemiCloud)
- A blogging platform (Free using WordPress)
- A WordPress theme (using GeneratePress)
- WordPress plugins (Free)
What skills do you need to start your blog?
If you have basic computer skills, you should be able to create a blog without any problems. You don’t need to understand coding or web design.
This tutorial will take you step-by-step through the entire process of starting a WordPress blog from scratch (no steps skipped). You will have a beautiful, fully functional blog even if you have never created a blog before.
If you are more of a visual learner, I have also linked to some videos that you can watch.
What are the steps involved in creating a blog?
There are 11 easy-to-follow steps you need to take when starting your blog.
How long will the process of creating a blog take?
The actual step of getting your blog online should take you less than 20 minutes but the whole process (including writing your first blog post) should take you about 2-3 hours.
Here is a breakdown of the time you will spend in the various parts.
However, to avoid feeling overwhelmed, you should go at your own pace and feel free to take a break whenever you feel the need to.
Step 1: Choose a Blogging Platform
For this tutorial, we shall use WordPress. WordPress is the most popular blogging platform powering over 40% of all websites on the internet. It has several great advantages.
- It is open-source. You don’t face restrictions like in other free or commercial blogging platforms.
- It is free. This saves you money when starting a website.
- It is intuitive and easy to use. If you can use any word processor like MS Word, then you will not have any problems using WordPress.
- There are thousands of free themes and plugins that you can use to customize your blog into whatever you want.
- It is great for SEO and getting traffic from Google.
- It is easy to install. With the web hosting company we shall use (ChemiCloud), setting up WordPress is an easy one-click process (see Step 6).
Step 2: Choose a Domain Name
Your domain name is your blog’s address on the internet. It is what people type in their browser when they want to visit your blog. For example, indiebounty.com
Registering a domain name is cheap but it will make your blog look professional and SEO friendly. You can also start building your own brand and domain authority from day one.
Quick tips on choosing a good domain name
Here are some general tips you can use when choosing your domain name:
- Be unique. Your domain name is your brand so it should be a name that will stand out.
- Get a .com domain name extension where possible. A .com domain name is easy to remember because people are more familiar with websites that end with a .com.
- Be descriptive. Choose a domain name that indicates your business or niche. For example, tribalcarpets.com if you have a carpet business.
- Choose a name that will not limit the growth of your blog. For example, if you choose woolcarpets.com, this can restrict you to wool carpets and give you problems when you want to expand into other kinds of carpets.
- Keep your domain name short and memorable. It should be easy to spell and pronounce.
- Avoid having numbers and special characters (such as hyphens, dollar signs, or underscores).
- Avoid trademarked names. This can get you sued.
Pro Tip
Changing your domain name may impact your rankings. After moving your content to your new domain, make sure you do a 301 redirect from the pages of your old domain. Tell Google you have moved through the webmaster tools
How to get a domain name
The easiest way to get a domain name is to sign-up for a web hosting account. We shall do that in Step 5.
Step 3: Choose a Web Hosting Provider
Although the WordPress blogging platform is free, you will need a web hosting company to host your blog.
It is important to choose a good web hosting company. Choosing the wrong web hosting company can lead to many problems with your blog which will limit the number of visitors you can get. These problems include:
- Slow loading times
- Frequent downtimes
- Vulnerability to hacking
For this tutorial, we shall use ChemiCloud which is one of the best web hosting companies for shared hosting.
Why use ChemiCloud?
ChemiCloud is value for money considering the benefits they provide.
- It is rated as excellent (5 stars) by over 98% of actual users who have reviewed it on sites like Trustpilot.com . Many popular competing companies get less than 40%. Take time to read through the user reviews.
- They usually give great discounts from time to time (check for a discount).
- They provide a free domain name. Most other companies charge over $10 a year.
- They have a helpful support team that responds quickly to issues.
- They have super-fast hosting with speed-enhancing features like SSD drives, multiple server locations, Cloudflare integration, and server-side caching.
- They have great security features such as a firewall, free SSLs, free daily, and weekly backups.
- They have a 99.9% uptime guarantee. Say goodbye to frequent downtimes.
- They have an extra-long 45-day money-back guarantee. If you don’t like the service, cancel within 45 days and get your money back.
- Free domain transfers. If you are frustrated with your current web host, they will help you transfer up to three of your websites for free after you sign up.
See additional ChemiCloud features and pricing here.
Pro Tip
When it comes to shared hosting providers, many of the popular and heavily advertised hosts tend to have sub-standard service. Look at sites like Trustpilot to see reviews by actual users of the service
Step 4: Choose a Web Hosting Package
With ChemiCoud, there are three main shared hosting packages you can choose from. The package you choose depends on your needs. You don’t want to pay for resources you won’t use nor do you want to deprive your blog of resources it needs to function.

How to choose between shared hosting packages at ChemiCloud
Here is how to decide which ChemiCloud shared hosting package will fit your needs.
#1. Starter
This is the cheapest option but you get fewer resources compared to the other options. Choose this option if:
- You only want to host one website.
- You are on a budget or you just want to do blogging as a hobby.
- You are just starting out and you don’t expect much traffic.
- You don’t need a lot of resources (20 GB storage, 1 GB RAM, 250,000 inodes, and 1 CPU cores).
#2. Pro
This is an affordable option with a decent amount of features and resources. Choose this option if:
- You want the ability to host multiple websites.
- You want more advanced features (e.g. for a growing business or blog).
- You receive or expect to receive moderate traffic.
- You want more resources (30 GB storage, 2 GB RAM, 350,000 inodes, and 2 CPU cores).
#3. Turbo
This option is the most expensive of the three but also the most feature-rich. Choose this option if:
- You want the ability to host multiple websites.
- You receive or expect to receive a lot of traffic.
- You intend to run a resource-intensive website like an e-commerce store or membership site.
- You want the most resources available (50 GB storage, 3 GB RAM, 500,000 inodes, and 3 CPU cores).
- You need advanced speed features like GZip Compression, Memcached, or Litespeed.
Step 5: Register for a Web hosting Account and Domain Name
Once you have decided on the most appropriate web hosting package, it is time to register for your account and domain name.
If you have any problems when signing up for a ChemiCloud web hosting package, you can contact the ChemiCloud team via their live chat button on their website.
They respond pretty quickly to their chats.
#1. Register for a ChemiCloud package
For this tutorial, we shall assume that you are just starting out and you don’t expect to receive a lot of traffic in the near term. We shall therefore go with the cheapest option (ChemiCloud shared hosting package Starter).
However, you can choose any of the other packages depending on your needs or expected needs.
Go to ChemiCloud’s Starter and click Get Started Now
#2. Register your domain name
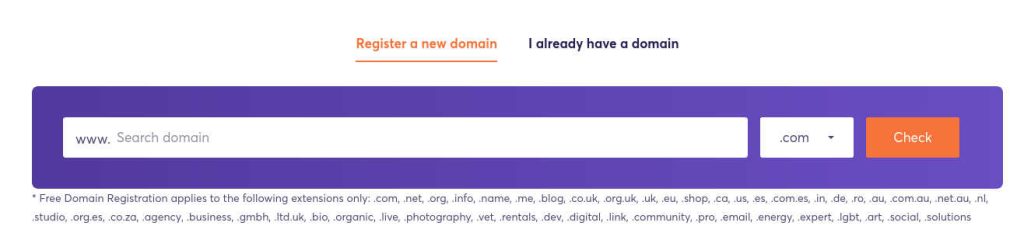
1. If you don’t have a domain name registered, click on the ‘Register Domain’ tab and search to see if the domain name you want is available.
2. If it is available for purchase, click ‘Use This Domain’. If the domain name is already taken, it will request you to choose another domain name.
3. If you have already registered a domain name with any other provider, click ‘I already have a domain’ and enter your domain name then click ‘Use this domain’
#3. Fill in your account information
You will be required to fill in your:
- First and Last Name
- Master password
- Country
- State/Region
- Zip Code
- City
- Address
- Phone and company (Optional)
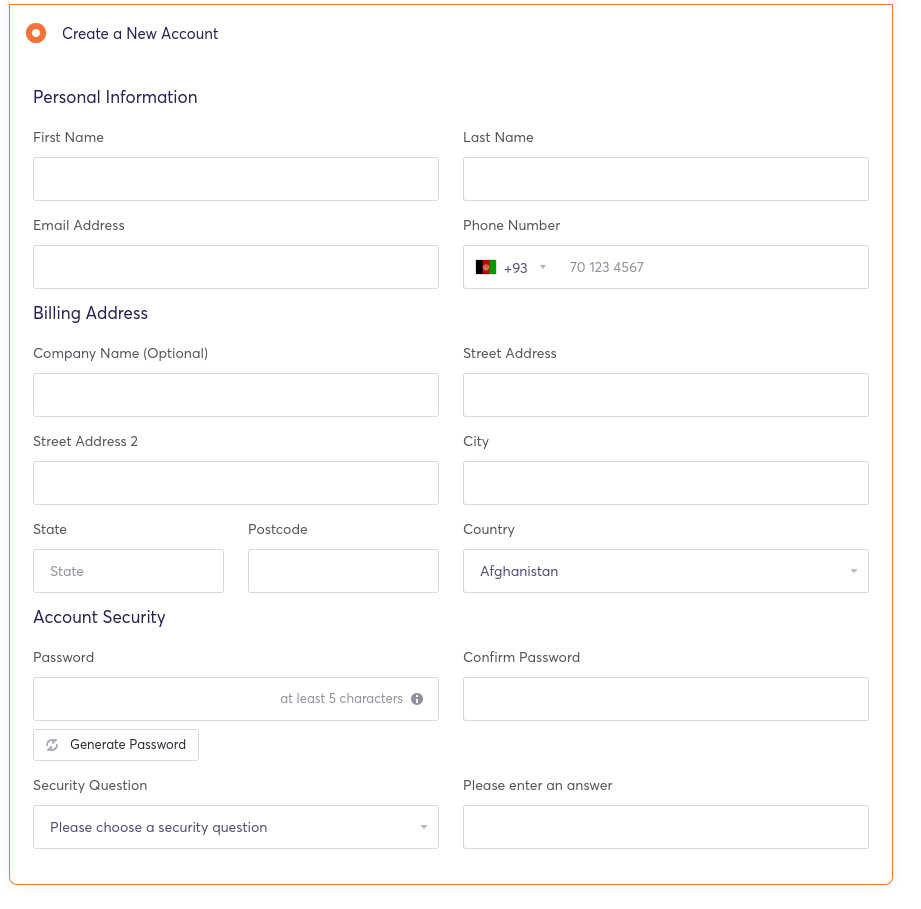
Ensure you give the correct information. The email address and phone number you provide will be used to contact you in case there is a problem with your account or you need to renew your domain or account.
#4. Fill in the product information
- Choose the hosting plan depending on your hosting needs.
- Choose the datacentre location that is nearest to where you expect the majority of your visitors to come from.
- Choose the hosting period. Choose at least a year if you want to benefit from the hefty discounts on offer.
Pro Tip
Once your web hosting period expires, the discounted prices will no longer apply. On renewal you will be re-billed at the undiscounted price. It is best to lock in the discounts for the longest period you can afford. ChemiCloud allows you to lock the discounted prices for up to 3 years (36 months).
#5. Choose Extras
You don’t need many of the extras. The extras I would consider are domain privacy (ID Protect) and domain registration. If you registered your domain with ChemiCloud(in Step 2), this should be automatically filled for you.

Domain privacy protection is essential if you want to protect your private information such as your phone number, email, and home address. If you don’t enable domain privacy, anybody can get your private information by checking your Who.is records.
Spammers and scammers will use your information to call you or send you unsolicited marketing material.
#6. Fill in your payment information
You can pay for ChemiCloud using a credit card, debit card, or Paypal.
#7. Log into the ChemiCloud control panel
Once you are done setting up and paying for your web hosting account, you can log in to ChemiCloud using your email address and the master password you created.
You can access the login from the client area on the ChemiCloud home page. Look for the Client Login on the top right side. You can also access it from the welcome email that ChemiCloud will send you.
The welcome email will also have some useful information including:
- The amount of money you paid and the billing cycle (including your next due date).
- Your login details (username and password).
- Link to access the control panel.
- Your server information (including your nameservers). If you did not get your domain name from ChemiCloud, you will need the nameservers to connect your domain name to your hosting account).
Ensure, therefore, that you give the correct email address.
Step 6: Install and Configure WordPress
To install WordPress, you first need to log into your ChemiCloud client area using the procedure above.

Once you are in the client area, you can log into the control panel by clicking on the ‘CP’ button under active services.

#1. Install an SSL certificate on your domain name
Before you set up WordPress, you need to install an SSL certificate for your website. An SSL has several benefits.
- It protects your visitors’ data from hackers. It is especially important if you collect personal data like credit card numbers, addresses, emails, medical history, or e-commerce data.
- It helps with getting traffic. If you don’t have an SSL certificate, browsers and search engines will warn your visitors that your site is not secure. This will chase away many of your potential visitors.
You can get an SSL certificate for free using Let’s Encrypt SSL. If you have hosting with ChemiCloud, installing an SSL certificate is simple.
- Log into your ChemiCloud cPanel and then go to Let’s Encrypt SSL.
- Go to Issue a new certificate and choose the domain or subdomain you want to protect with an SSL certificate and then click on the Issue button under the Actions tab.

Once your site is secured with an SSL, the HTTP acronym before your domain name will change to HTTPS. A secure padlock sign will also appear on the URL address bar.
After installing the SSL, you may also want to force all traffic to go through the secure HTTPS. To do this
- Go to Control Panel then Domains.
- Select the domain with the SSL and then under the ‘Force HTTPS redirect’, click ‘On’.
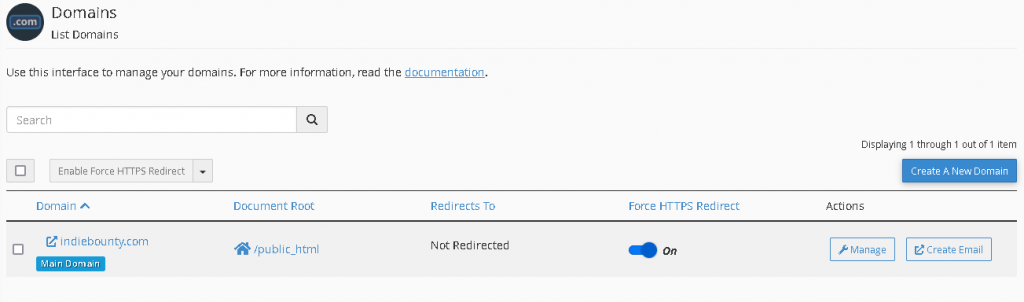
Do not do this step if you are already using a plugin like Really Simple SSL to force the redirect.
#2. Install WordPress
Once you log in to your client service area, you will see a product service table with details about your hosting package.
- Under the Quick actions column, click on the Control Panel button ( it looks like a red CP) and enter your master password.
- Once in the control panel, navigate to the Softaculous App Installer.
- From here, click on Install WordPress.

Once you click on Install WordPress, you will be taken to the WordPress Install Manager.
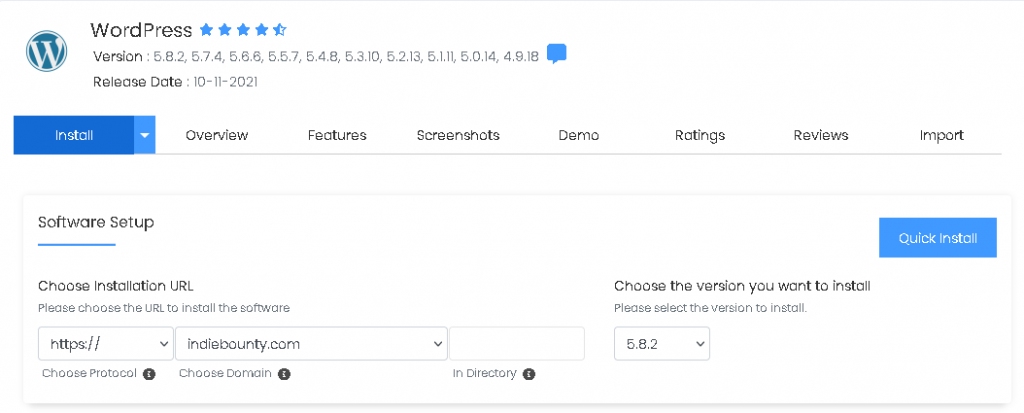
On the installer, you can choose:
- The version of WordPress that you want to install. It is best to install the latest version.
- The directory you want to install the WordPress. For most people, it is best to leave this blank so that it is installed into the root directory. This will enable you to log in from yourdomain.com/wp-admin otherwise you may need to type in an extra directory like yourdomain.com/wp/wp-admin.
- From this section, you can also fill in your site name, description, username, and password. Ensure you have a strong password and avoid using the default ‘admin’ as a username. This will leave you vulnerable to hacking. This password is different from your account master password.
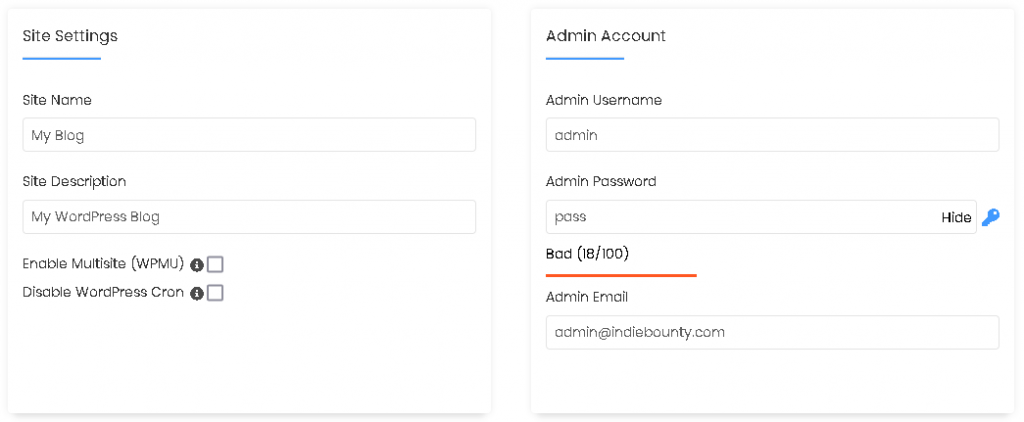
There are several other sections you can complete during this installation process (such as installing a theme) but you don’t need to do it at this stage. After you have filled in this section, click on the Install button at the bottom of the page.
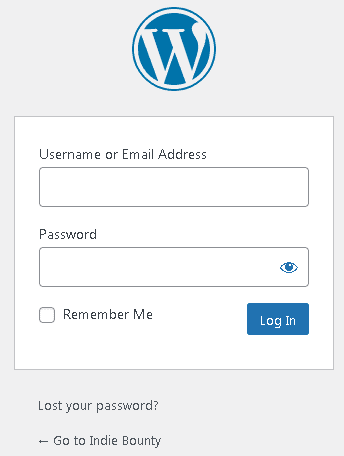
Once your WordPress installation is complete, you can log into your WordPress dashboard by typing your website address into your browser with /wp-admin added to the end of it. For example: yourdomain.com/wp-admin
This will take you to the WordPress login page.
You can also log in through your WordPress manager at ControlPanel>> WordPress Manager by Softacoulous
#3. Configure WordPress
Once you have installed WordPress, log in so that you can make some basic configurations.
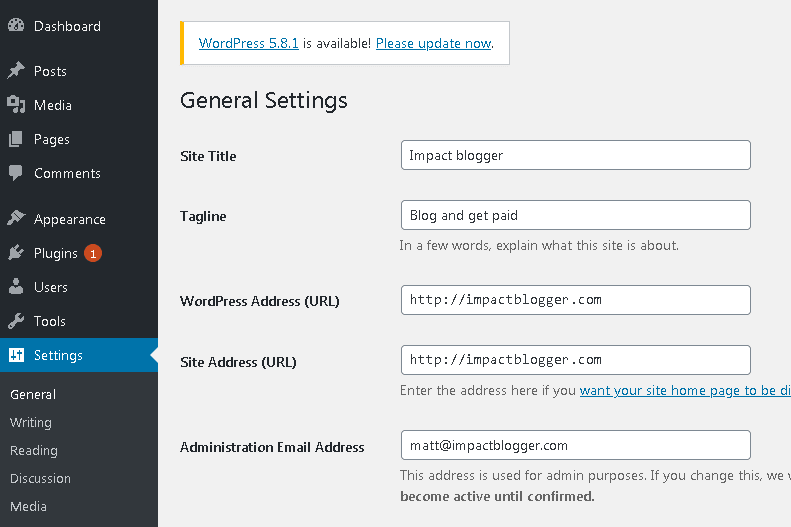
- Configure General settings
Under general settings (Settings >> General), you can set your site title, tagline, URL, and administration email.
- Configure Permalinks
A permalink is the part of the web address that comes after the domain name. You can configure permalinks under Settings then Permalinks.
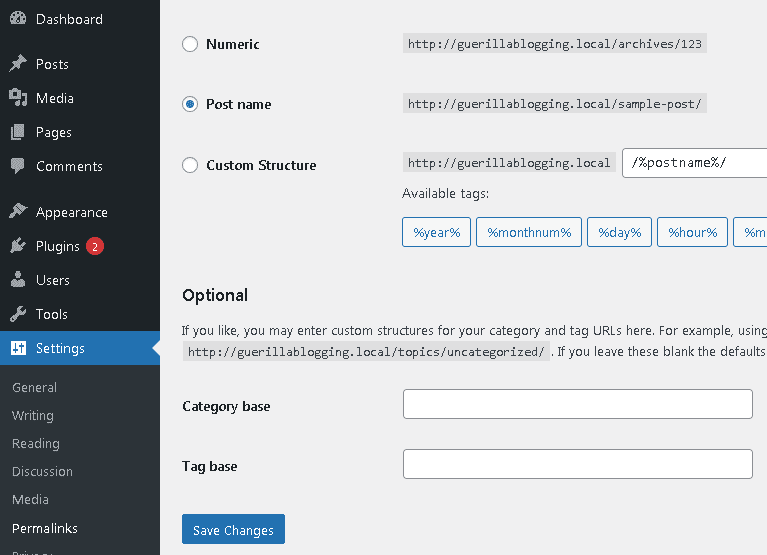
For most bloggers, it is best to set this option to display Post name. This will display the name of your post in your URL. For example, if your blog title is ‘how to bake a cake,’ it will display a URL like:
http://impactblogger.com/how-to-bake-a-cake
This is good for readers because they can tell what the post is about without looking at the contents. It is also better for SEO purposes.
- Configure reading settings
Under reading settings (Settings >> Reading), you can set whether you want a specific page for your home page or whether you want it to automatically display blog posts. If you have not created a homepage, you can leave it to display your latest posts.
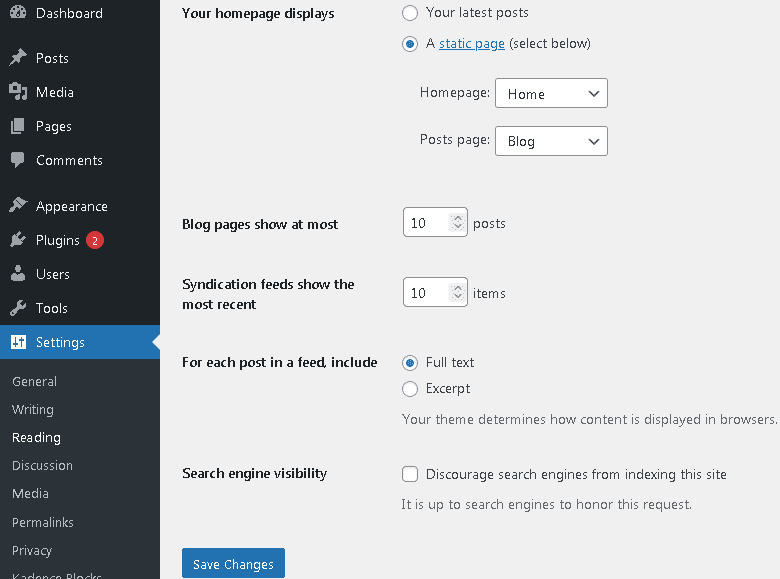
- Ensure that you can be discovered on search engines
Under reading settings, ensure that the box (Discourage search engines from accessing this site) remains unchecked. If you click this box, Google and other search engines will not index your site.
- Other things you can do
The following are some additional optional steps you can take.
- Delete plugins that come pre-installed such as ‘hello dolly’ or ‘Akismet’.
- Delete themes that you will not use
- Delete sample pages and posts such as ‘Hello World’.
- Update WordPress, themes, and plugins
- If you don’t want people to comment on your posts, you can remove that ability under the Discussion section.
Video Tutorial on Configuring WordPress
This seven-minute video will take you through the basic configurations of a WordPress website.
Step 7: Install a Word Press Theme and Design Your Blog
Your WordPress theme will determine how your blog will look. In the past, you had to hire a web designer to design your blog or website but these days, you can do it by yourself using a WordPress theme.
In this step, we shall install a modern, fast-loading WordPress theme that looks great.
#1. Choose a WordPress theme
For this tutorial, we shall use the free version of the GeneratePress. It is one of the best free themes available. It has design and customization features that you don’t often find in free themes.
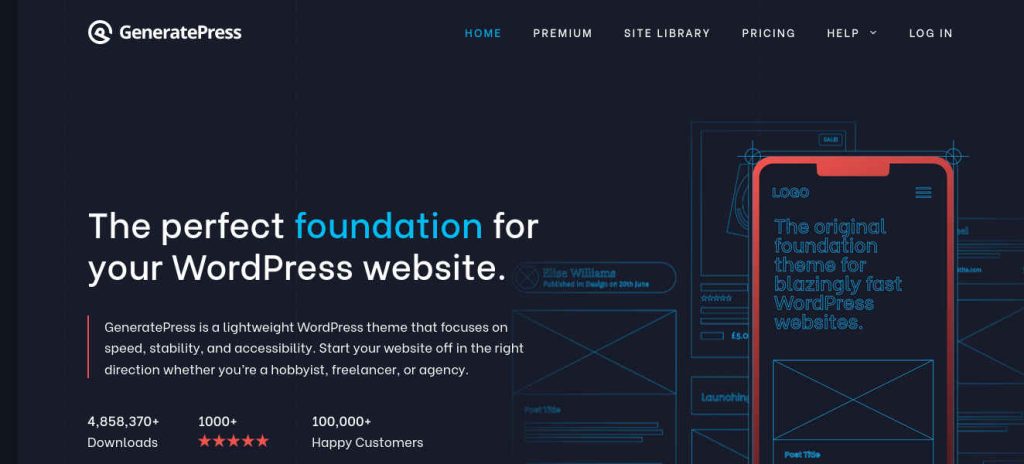
Why choose the GeneratePress theme?
- It is one of the most popular themes in the WordPress theme repository.
- It is highly rated (5 stars).
- It is lightweight. This is important if you want your site to load quickly.
- It is Gutenberg and WooCommerce ready.
- It is regularly updated which will help protect your blog from malware.
- You get the free version of the GenerateBlocks, an excellent block-based page builder. You also get a variety of attractive starter templates.
Should you get a paid version of the GeneratePress theme?
You should get the premium version of GeneratePress if:
- You need priority support. This helps if you need someone to quickly sort out problems with your theme.
- You want to create flexible custom designs. You get far more design features than in the free version including the ability to create child themes.
- You are a business owner or digital marketer and you want to create pop-ups, sliders or advanced landing pages.
- You want to start an e-commerce store. With the GeneratePress, you get many advanced WooCommerce features that will help you design an attractive and high-converting e-commerce store.
- You want to take advantage of their attractive lifetime deal. You make one payment and get lifetime support, updates, and new releases. The premium version of the GeneratePress is quite affordable compared to many other themes (check price). It will save you money that you would have otherwise spent on theme builders, landing page builders, sliders, and pop-up builders.
#2. How to Install a WordPress theme
In this section, I will show you how to install both the free and the paid versions of the GeneratePress theme. If you don’t want to install the GeneratePress theme, you can use the same process to install any other theme.
- Installation process if you are using a free theme
1. From your WordPress admin dashboard, go to Appearance >> Themes then Add New.

2. Go to the search themes bar at the top right corner and then search for “GeneratePress’ and click Install then Activate.
3. You also need to install GenerateBlocks which will add many features to the free GeneratePress theme. This will help you design a great-looking website. To install GenerateBlocks, go to Plugins >> Add New and then search for GenerateBlocks. Click Install Now and then Activate.
- Installation process if you are using a paid theme
You can use this process if you are using the paid version of the GeneratePress theme or any other paid theme that is not in the WordPress theme repository.
1. Download the paid theme from the GeneratePress website (or your vendor website). The paid theme will be downloaded as a Zip file.

2. Go to your WordPress admin dashboard then click Appearance, Themes then Add New.
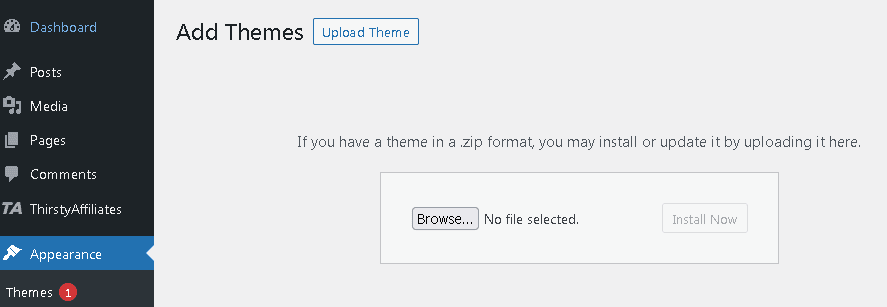
3. At the top of the page, click on the button for Upload Theme then Browse. You can use this button to navigate to where your zip file is saved on your computer and upload the zip file.
4. Go to Appearance then GeneratePress. Enter your license key and license email.
6. Click on Install then click Activate
If you go on YouTube, you will find many tutorials that will show you how to design your blog using GeneratePress and GenerateBlocks. For example, you can check out this tutorial.
Step 8: Install Essential WordPress Plugins
Plugins are like apps for your website. They extend the functionality of your blog to enable you to do things like add contact forms, security features, or e-commerce stores.
In this step, we shall install essential, high-quality plugins that will not slow down your site or leave you vulnerable to hacking attacks.
#1. How to install WordPress plugins
- Install a free plugin from the WordPress directory
You can get thousands of free plugins from the WordPress plugin directory.

1. To get plugins in the WordPress directory, go to your WordPress admin dashboard then click on Plugins then Add New.
2. You can browse the available plugins or search for a plugin by name in the search plugins bar.
3. Once you find the plugin you want, click install now and then Activate.
- How to Install a plugin that is not available in the WordPress directory
You can also install a plugin that is not in the WordPress repository, for example, a premium plugin that you have bought from a vendor.
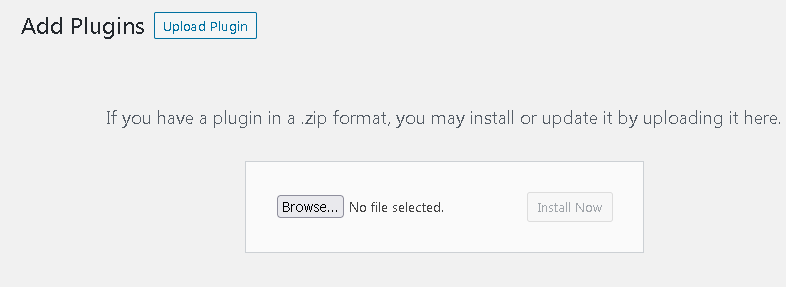
1. Go to your WordPress dashboard then click Plugins then Add New.
2. At the top of the page, you will find a button for Upload Plugin then Browse. You can use this button to search for your zip file on your computer.
3. Upload the zip file and then click Install Now. Enter your license details then Activate.
Video Tutorial on How to Install Plugins
This short (6-minute) video will show you the various ways you can upload a plugin.
Essential Plugins for a New Blog
You can find many good plugins for free in the WordPress plugin directory. However, you should not add too many unnecessary plugins because they will slow down your site and may even pose a security risk.
In this section, I will highlight some of the essential plugins you can use. For each function, I will provide the best free plugin and the best premium (paid) plugin. Paid plugins generally have more robust features than the free versions and you also get customer support.
If you are starting out and don’t have a budget for the paid plugins, the free versions will keep you going until you can invest in your blog.
The most important plugins you will need are:
#1. A security plugin
Over 30,000 websites are infected with malicious code every day. Malicious bots crawl around the web looking for sites that are not well protected. New sites are especially vulnerable to infection and hacking.
You can greatly improve the security of your blog by installing a security plugin. A security plugin will:
- Automate the technical aspects of hardening your blog by recommending important security configurations.
- Warn you if your password is weak.
- Harden your login page through various techniques like limiting login attempts.
- Create a firewall to protect your site.
If you are starting out, you can get by with a free security plugin. One of the most popular plugins is All in One WP Security. It is highly rated and has over 1 million installations.
If you have a mission-critical website or e-commerce store, you need to have protection beyond what free plugins can provide. One of the most highly-rated paid security plugins is Astra Security.
The main advantage of Astra Security over a free plugin is that Astra security will not only detect malware but remove them as well. You also get fast customer support whenever you need it (see more Astra Security features and pricing).
#2. A speed optimization plugin
53% of visitors to your blog are likely to leave if it takes longer than three seconds to load. All your efforts to bring in visitors will be wasted if over half your visitors leave before they have a chance to read your content or buy from your e-commerce store.
A speed optimization plugin will help you to speed up your site through various means including:
- Caching your pages
- Minifying Javascript and CSS
- Compressing your images
- Cleaning your database
If you don’t have the budget for a paid speed optimization plugin, there are many free plugins that you can use. One of the most popular free optimization plugins (with over 1 million installations) is WP-Optimize. Check out features of the free version of WP-Optimize here.
The problem with free plugins is that you often need multiple optimization plugins to adequately speed up your site. If you want a blazingly fast website without having too many optimization plugins, you can go with a paid plugin like WP Rocket.
WP Rocket is the most popular paid speed optimization plugin and it has over 1.2 million installations. With WP Rocket, you get many more features compared to the free WP-Optimize (such as lazy loading, WebP images, or scheduling). It is also quite affordable (check price) and you get great customer support.
The team behind WP Rocket have also developed a free image optimzation plugin called Imagify. Install this to automatically reduce the size of large images with one click.
#3. A backup plugin
If you don’t regularly back up your blog, you can lose all your content if you get hacked or there is a problem with your server. You need to ensure you host your blog with a good web hosting company that will regularly backup your blog. ChemiCloud has free daily and weekly backups.
However, even if you have a great web hosting company, you also need to have your own backups just in case. These backups need to be stored away from the server either on your PC or the cloud.
There are two excellent free plugins you can use: Updraft Plus or WPVivid. Either will get the job done.
If you have several sites, consider going with the paid version of WPVivid. You get multi-site support, staging, migration, and image optimization among many other features (see here). It is also quite affordable and they currently have an attractive lifetime offer where you can pay once and get lifetime updates and support (see here for more)
#4. A page builder
The free GeneratePress theme is quite powerful for most blogging tasks. However, if you are heavy into digital marketing or e-commerce, you might need some additional features that will help you do things like create:
- Pop-ups, slide-ins or sales banners.
- Immersive e-commerce stores that enhance conversions.
- Optimized landing pages.
- Review or testimonial widgets.
In such cases, you should look at the premium version of GeneratePress.
#5. A forms plugin
A contact form is essential if you don’t want to display your email address on your contact page. This can help cut down on spam emails.
You can use the free contact form by Fluent forms. It is a lightweight, drag and drop form builder that can help you create more attractive and secure contact forms.
If you want more advanced features, check out their paid version. The pro version will enable you to create many different kinds of forms like:
- Email opt-in forms.
- Conversational forms (multistep forms).
- Forms with calculated fields.
- Collect payments and donations.
Fluent Forms is affordable (see pricing) and it has a great lifetime offer with free lifetime updates and support (check it out here).
#6. A Google Analytics Plugin
Google Analytics is a free visitor tracking software from Google. It will help you to track and understand the behavior of your visitors. For example:
- How many visitors come to your blog?
- Which countries do they come from?
- Which sources bring in the most visitors to your blog?
To install Google Analytics, you can use a free plugin like MonsterInsights. You just need to sign up for Google Analytics and then link it using the MonsterInsights plugin. MonsterInsights will enable you to see your analytics data right from your WordPress dashboard.
MonsterInsights also have a premium version of their plugin that has advanced analytics for e-commerce stores. See features and pricing of the premium MonsterInsights plugin.
Google also have their own analytics plugin called Site Kit. The MonsterInsights plugin, however, has better ratings than Site Kit on the WordPress repository.
#7. A comment spam plugin
If you have enabled comments on your blog, you need to protect your blog against spam comments. Spam comments not only devalue your brand but also clog your database and make your site slow.
The best free option for protecting your blog against spam is Antispam Bee. It is highly rated and has over 700,000 installations. It is free for both personal and commercial use.
Alternatively, you can check out Akismet. It is developed by the same team that developed WordPress (Automattic) and usually comes pre-installed in WordPress. Akismet is free for personal use but if you want to make money from your blog (e.g. through ads, affiliate marketing, or selling products), you have to use the paid version. The plans are, however, quite affordable (see prices).
Step 9: Create Essential Blog Pages
With a WordPress blog, you have the option of creating either pages or posts. Pages are normally used for static pages (such as home page, blog page, or contact page). Posts are used for content that is regularly updated. Unlike a page, a post will normally have a date, the name of the author, and the ability to comment.
How to create a page in WordPress (Steps)
To create a new page:
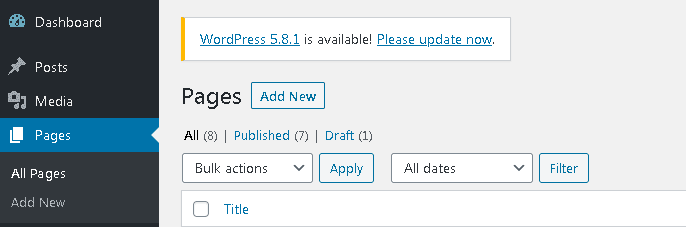
- From your WordPress admin dashboard, go to Pages then Add New.
- Enter the title of your page in the top box.
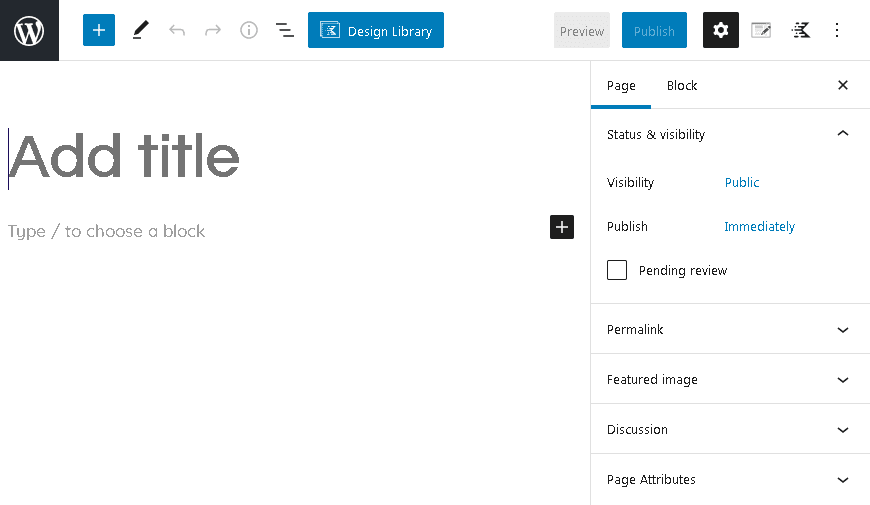
- Enter the content using Gutenberg blocks by clicking the plus sign, alternatively, you can paste your content in and Gutenberg will automatically convert it into blocks.
- Click Publish when you finish.
Pages every WordPress Blog needs to have
Here are the main pages you need for your blog.
#1. Home Page
The purpose of the home page is to introduce your visitors to what kind of content is on your site. A well-optimized home page can play an important role in helping your visitors navigate through your site which will help increase the time they spend on your blog.
Some of the information you can have on the home page include:
- The latest posts
- Popular posts
- Your ‘money posts’ i.e the posts that make you the most money
- Your email signup offer
- Any products or services you sell
If your blog is still new and you don’t have much content, you can set this page to automatically display your latest blog posts. As demonstrated in Step 7 (configuring WordPress)
#2. About Page
The about page is where you introduce yourself or your company. A strong ‘About’ page will help you optimize your E-A-T (Expertise, Authoritativenss and Trustworthiness) to get better Google rankings. Some of the information you may want to include here is:
- Why you created your blog
- Your expertise and why you think you are the best person to help people
- Your notable achievements or awards
- Your Story
#3. Contact Page
Your contact page is where you provide your visitor with a means to contact you.
Some of the information you can have here include:
- A contact form. Your visitors can use this form to send you an email. There are many ways you can create a contact form using free plugins like Fluent Forms or Contact Form 7.
- A phone number. If you run a business, you can include a business phone number for people to call you.
- A map. This will help your customers find where your business is located in case they want to visit.
The are other pages that you may need but you don’t need to create them at the beginning
- Disclaimer Page. If you make money from your blog from endorsing products or through affiliate marketing, FTC guidelines require that you have this page.
- Privacy policy page. If you collect information from your visitors you need to have a privacy page that tells your visitors which kind of information you collect and for what purposes.
- Terms of service page. This page outlines the rules for using your website and the products and services in it.
Step 10: Create a Blog Post
How to create a blog post (Steps)
To create a new post:

- From your WordPress admin dashboard, click Posts then Add New.
- Add your blog post title at the top.

- You can add content to your post by typing directly or by pasting content from a word document. Click on Type/to choose a block
- If you need a specific style, for example, a header, button, or image, you can add it as a Gutenberg block. Click on the + sign which will give you access to different blocks.
- Once you have finished writing your post, you can add a category
- There are some optional things you can also do like adding a featured image or adding tags to your post.
- Once you are done writing your post, click Publish.
Writing your first blog post
Don’t expect your first few blog posts to be perfect. The most important thing is to get them done. This will help you to familiarize yourself with the process of blogging.
Consistent blogging will also help you to build momentum and make blogging a habit. The great thing about blogs is that you can always come back later and edit your posts.
When writing a blog post, think carefully about what you want the post to do.
- What problem are you solving?
- Who are you writing the post for?
- What do you want your visitors to do after reading your post?
Quick tips on writing blog posts that make money
For you to make money from your blog posts, you first need to attract the right kind of visitors to your blog and then get them to read your posts. Here are three quick tips that can help you do this.
1. Write SEO-optimized blog posts. Write posts that target keywords that people are already searching for in Google. If you do a good job of this, you will get free evergreen traffic from Google. Use a keyword tool like Semrush (excellent but expensive) or Keysearch (affordable) to find out which keywords people are typing into Google.
2. Write compelling headlines. People are more likely to read and share your posts if you have compelling and interesting headlines. This is why some top marketers spend more time on their headlines than their actual content. Before you publish your post, look at posts that are already ranking for your keyword and see what kind of blog titles they have.
3. Eliminate grammatical errors. Grammatical errors will make your blog look amateurish and this will lower your conversion rate. Use a tool like Grammarly to correct errors in your blog post before you post. They have a free and a paid version of Grammarly. If you are starting out, the free version is okay but if you have the budget, the paid version will help you catch more errors (see Grammarly features and pricing).
Step 11: Make Money from Your Blog
There are many ways you can make money from your blog. The three easiest methods to implement are:
#1. Placing display Ads on your site.
If you are getting some traffic to your site, you can sign up to an ad network like Google Ad Sense or a premium ad network like Ezoic.
If you go with a premium Ad network like Ezoic, you will get higher earnings as well as features like speed optimization, detailed reporting, and support.
Many premium ad networks have stringent requirements which make it hard for beginners to get accepted. Ezoic is the most convenient ad network for beginners because, unlike other premium ad networks, Ezoic has no minimum traffic requirements for beginners.
If you are a new blog with less than 10,000 pageviews, see how you can apply to Ezoic here.
#2. Sharing affiliate links
If there is a program or service you like, you can share their affiliate links on your post and whenever someone buys something, you will get a small commission.
Affiliate marketing is easy to implement and can be done from day one. The best way to get started with affiliate marketing is to join an affiliate program like Amazon Associates or an affiliate network like Shareasale.
To make it easier to share, track and organize your affiliate links, use a link manager like Thirsty Affiliates. They have a free version and an affordable paid version that you pay for yearly. Check out some of the extra features you get with the pro version.
#3. Sell digital products
Selling digital products is another easy way for beginners to make money from blogging. You can start selling digital products like pdfs, ebooks, photos, designs, patterns, or photos from day one.
The easiest way to sell digital products is using a service like Payhip. With their free tier, if you don’t sell then you don’t incur any charges. They only charge you a transaction fee when you sell. Check out Payhip pricing here.
Next Steps
If you have followed all the steps correctly, then by now you should have an attractive, fast, secure, and fully functioning WordPress blog that is optimized for making money.
All that is left for you is to keep blogging consistently and learn all you can about blogging.
Further reading